
Chrome OS - Installation
So, you read our chrome OS introduction article and decided to give it a try. Well, you are at the right place, In this article, we are going to go through The step-by-step process of Installing chrome OS on your laptop, and let's give it a new life. To successfully install chrome OS on your device, you need a windows machine, a USB flash drive, and a stable internet connection.
Make sure you have all these requirements fulfilled and let's start with the process of getting your PC / Laptop ready.
Step - 1. In order to boot a new operating system on your device, you need to disable secure boot from the UEFI/BIOS settings of your device. now you might ask...
What exactly is BIOS/UEFI? well, BIOS/UEFI is the firmware settings of your computer, in simple words, it is the piece of software that controls the booting settings of your PC/Laptop, it can be accessed by pressing a particular key or a set of keys depending on your Manufacturer,
it could be the delete key, the escape key, the shift key, or maybe something else. Google will be very helpful for you in this step.
Once you enter the BIOS / UEFI settings of your system
Step - 2. Now that our PC is ready to accept the new operating system, let's now prepare our USB drive. In order to flash the Chrome OS flex on the USB...
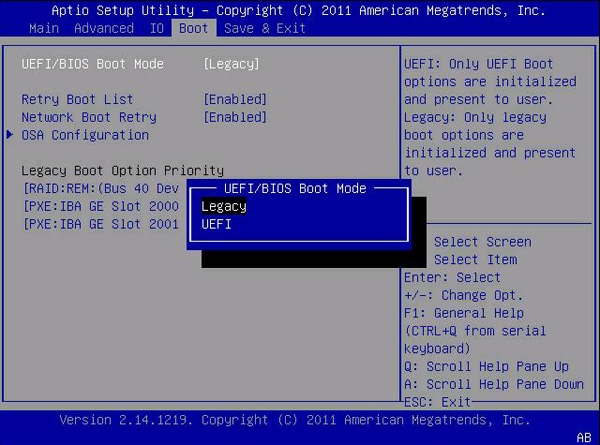
This is how the BIOS/UEFI settings look...yours might seem different, don't worry the looks of UEFI settings depend upon your manufacturer. Now you need to find the boot settings section, try pressing the right arrow key, and eventually, you'll end up on the boot settings, now you need to find the secure boot option and turn that off, now your system is ready to accept the new Operating-system that we are going to throw at it.
1> Go to the chrome web store and add the ' Chromebook recovery utility in your browser, or you add it directly by clicking here.
.png) |
| here is the preview of the extension. |
2> As soon as you add the extension, You'll get a notification asking you to click the extension icon in your browser's extensions section.
3> After you click the extension, a new window will open, which will ask you to plug a USB drive into your computer,
.png)
Now, plug in the USB drive in your PC and click on the get started button present in the bottom right corner.
4> Now you'll be greeted with a screen that asks for the model, click on the 'Select a model from the list' option and from the dropdown menu, select chrome OS flex, with the only channel available that is 'developer preview'.
.png)
.png)
.png)
5> Now, it will ask you to select the USB device that you want to flash chrome
OS in, Select the USB drive and the Utility will do the rest of the work fork for you.
.png)
6> the final step is to plug out the USB device once it's flashed with Chrome OS,

Now plug in the USB drive into your PC and boot into it using the boot key as previously mentioned. And follow the instructions as the installer says and you'll be able to install chrome OS successfully on your PC. This concludes the detailed explanation of each and every step in order to install it on our system. Follow us on Twitter, Instagram, and YouTube for more tech-related news and updates, we will be back with some interesting tech articles, until then, STAY TUNED, STAY SAFE!